|
|
DavesRepair.com |

|
|
Home Manuals: Frequently Asked Questions (FAQ) Dave's Dictionary of Appliance Terms
Garage Door Nation Has my website been helpful? Did you Know?

|
The
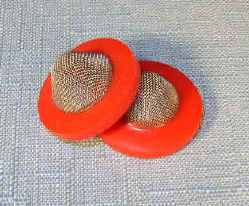
DRSNews In this issue: * Many newer washers use fill valves with internal screens that are really hard to remove for cleaning. And if you've never done it before, some can be tough to reinstall correctly, too. (you'll find these screens inside the fittings to which the fill hoses attach). So instead of struggling to pry them out to scrub them in the sink, just back flush them! You'll usually find that the cold screen's the only one causing a problem (most of the sediment in your hot water settles to the bottom of your water heater and never makes it as far as the washer), so that's the hose you'll want to remove when your washer's cold fill is barely trickling in. If this describes your washer, you'll first notice that the rinse cycle's taking a long, long time, because most machines are set up for cold rinse, filling with only cold water. With a clogged cold screen, a load of wash can take about a decade to get done! To fix this, turn off the cold water and unscrew the cold fill hose from the back of the washer. If your water supply has one shutoff lever that turns off both hot and cold water, this'll work too, but it's easier if they're separate faucets (see note below). If you can turn off just the cold water, hold a container under the plastic portion of the fill valve where you just unscrewed the hose, and set the washer to a warm wash fill. You'll see hot water entering the tub, but there'll also be some backing out through the cold side of the valve. The next step will vary depending on your washer brand, but basically you want to pinch off the fill tube that's taking that hot water to the tub, forcing as much as possible to divert back through that cold screen and into your container. On most brands, Whirlpool, Kenmore, etc, you can just reach up next to the fill chute, with the lid open, and pinch this small rubber tube a bit with your fingers. This takes less time than telling you about it, and has worked well for me. Some of the new plastic screens can be very hard to remove without damaging them, and this is a good alternative. I wish I could remember who first told me about this simple little trick many years ago. I'm indebted to him. Note: if your machine connects with a 'single lever' style faucet, you'll need to cap or kink/pinch off the cold hose, letting it hang into the tub while you do this. If you don't have a pinch-off pliers, just double it back on itself and gently squeeze it with a locking pliers. Or have a helper kink and hold it, with the end in the tub. It doesn't have to make a perfect seal. By the way, if you do happen to ruin a screen, don't panic. Just pickup a screened washer - fine mesh stainless steel works best - and add it to the faucet end of the hose. Just be sure there's a screen somewhere in each fill line, at one end of the hose or the other, or you'll eventually end up with an overflow, and that's far worse than dealing with a clogged screen! In those cases where the back of the washer's tough to access and the house water 's carrying a lot of sediment, I usually remove the screens from the valve and add a set of screen washers up at the faucets, within easier reach. Here's what they look like:
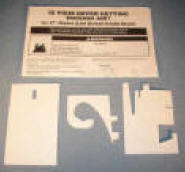
Here's a short article with more details. Be sure they're installed with the screen's point headed 'upstream', facing into the water flow. And as we've discussed before, it's also a good idea to apply some silicone-based grease to the faucet threads before reinstalling the hoses. * Finally! A simple little tool to test your Whirlpool or Kenmore dryer (also Kitchenaid, Roper, and Estate) vent for proper airflow. Now instead of asking folks to go outside and check for a 'good, strong airflow' (whatever THAT means!), there's a simple, inexpensive little device that'll tell you if your vent's OK or if it's time to drag out the ol' shop vac and clean it out. Just click on this picture of the kit for more details:
Just wish there was something similar for other dryer brands... *** Dave Harnish Only
Man can weep with sorrow.
Copyright www.DavesRepair.com |
|
Home | Site Map |
Contact me | Parts Specials |
Laundry Manuals All Content on This
Website is |